Comparison of different methods of scanning
In the fall of 2013 I went out with several film cameras and a digital Canon EOS-M. I took shots of different scenes with the cameras. I had the film developed at Dwayne's Photo. I compared five different methods of scanning the film images:
- Camera scanned with my Canon 60D + Canon 60mm macro lens + Photosolve Extend-a-slide. This is what most of this site is about. After trying conventional scanning (below), I find that camera scanning with my 60D is faster and easier than using either of my conventional scanners. And provides image quality that is comparable with my best conventional scanner.
- Camera scanned with my Canon G9 + Photosolve Extend-a-Slide + 58mm close-up lens set (See the Extend-a-Slide page for Canon and scroll down to your camera to see what accessories you need.) I wasn't impressed with the results I got with my G9. I think that the close-up lens has a negative effect on image quality. But if you have a camera like a G9, camera scanning is a fast way to digitize your slides and negatives. If the quality is acceptable to you.
- Using a Plustek 7600i with Vuescan. The 7600i is discontinued but the current Plustek 8200i has the same hardware but with different bundled software. Vuescan works with both. Image quality is excellent but scanning takes several minutes per frame. And you have to feed each frame manually. But you can interleave scanning with editing the images, so you don't end up twiddling your thumbs waiting for scans. Assuming that you edit each image.
- Epson V600 flatbed scanner with the bundled Epson Scan software. The resolution with 35mm negatives is less than the better methods (60D and 7600i) deliver, but the V600 is cost effective. It is also a very effective print scanner. And scanning negatives with Epson Scan is easier than with the 7600i because you load two strips of negative in the holder and Epson Scan figures out where each frame is and will scan and color convert in a single operation (that does take several minutes per frame.)
- Wolverine Super F2D This is a kind of dedicated camera scanner. The upside is it costs less than $100. The downside is the optical quality is compromised by the price point. But it does better than I thought it would. And it scans very fast. You feed the negative strip in the side of the machine and it only takes about five seconds to "scan" to a SD card. The color is sometimes wonky but can usually be edited into being decent. The F2D lets you examine negatives very qickly. IMO, it is worth it just to examine negatives even if you will be using a higher quality method to scan them for real.
All images were resized to be approximately eight megapixels (3600 pixels on the long side) because I figure that this is about all the resolution that can be extracted from consumer grade 35mm negatives.
Note: Don't pay much attention to color differences in the samples below. I attempted to make each image have plausible color, but I didn't attempt to match colors. This page is for examining resolution, not color matching.
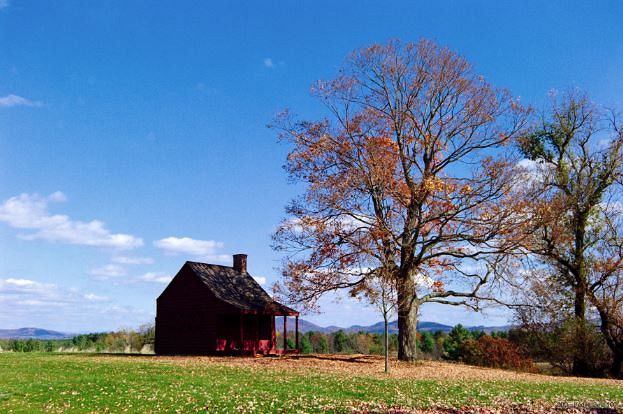
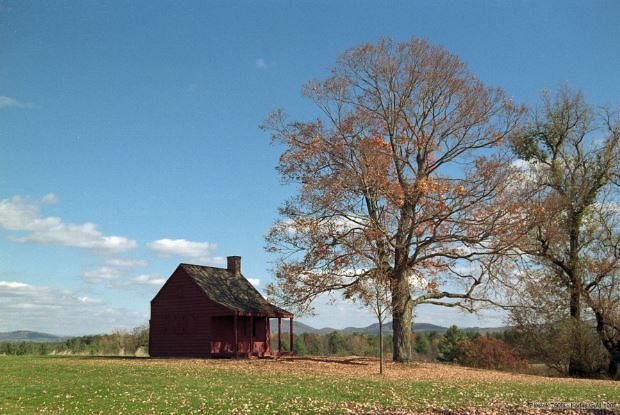
Reference image
For reference, this is the scene shot with a Canon EOS-M. The goal was to convert the negative so that it has as much detail (as possible) as the image from the EOS-M. So first we look at the EOS-M version.
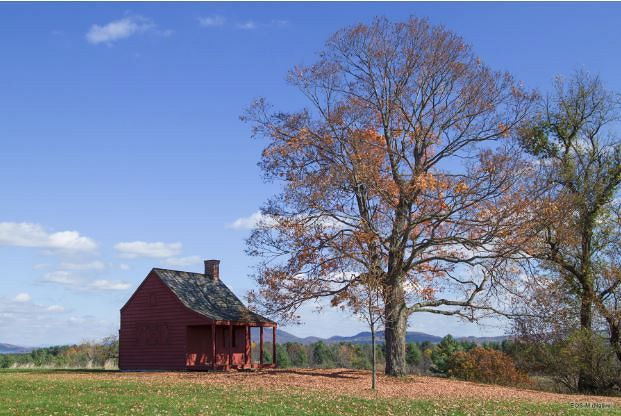
Shot with Canon EOS-M
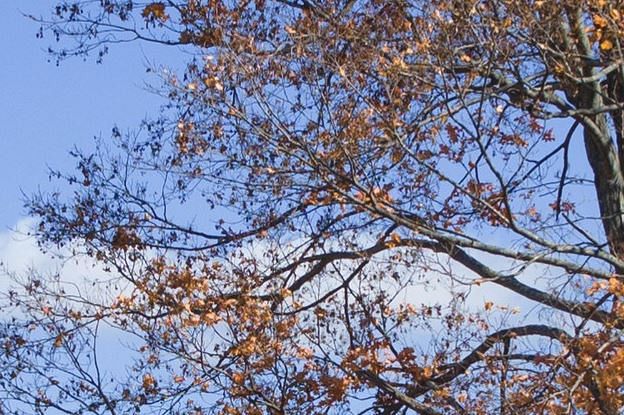
Canon EOS-M 100% crop
The rest of the images were scanned with the above described methods.
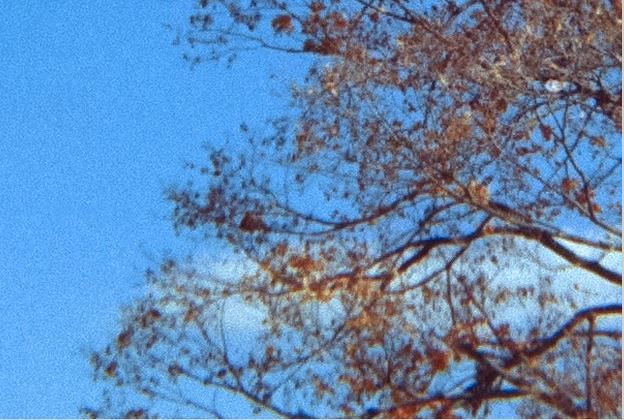
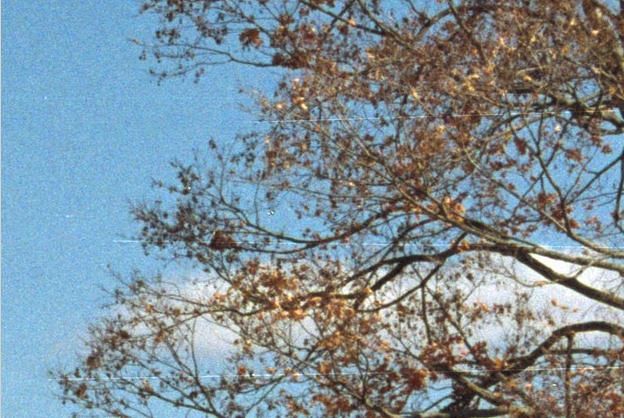
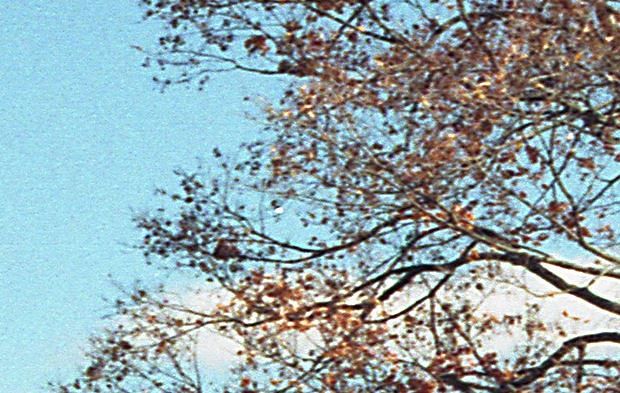
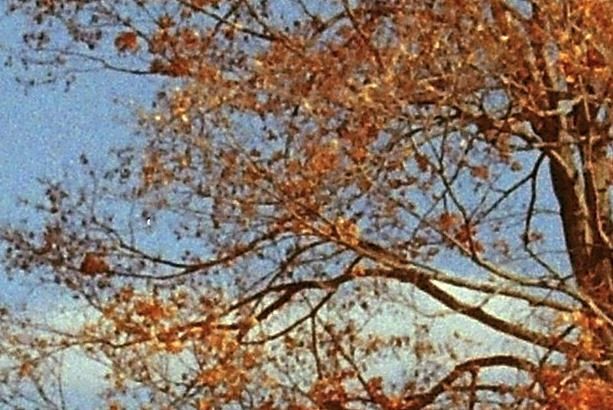
100% crops

Camera scanned with Canon 60D 100% crop
Camera scanned with Canon G9 100% crop
Scanned with a Plustek 7600i 100% crop
Scanned with an Epson V600 100% crop
Scanned with a Wolverine F2D 100% crop
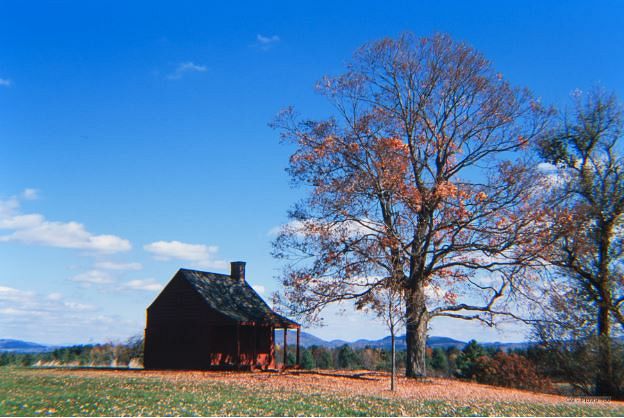
Full images
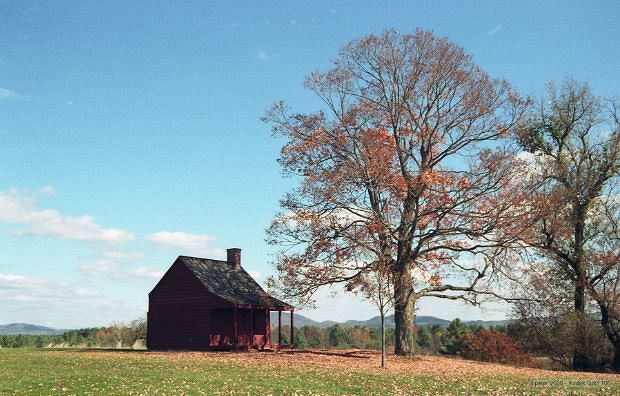
Canon EOS-M
Camera scanned with Canon 60D
Camera scanned with Canon G9
Scanned with a Plustek 7600i
Scanned with an Epson V600
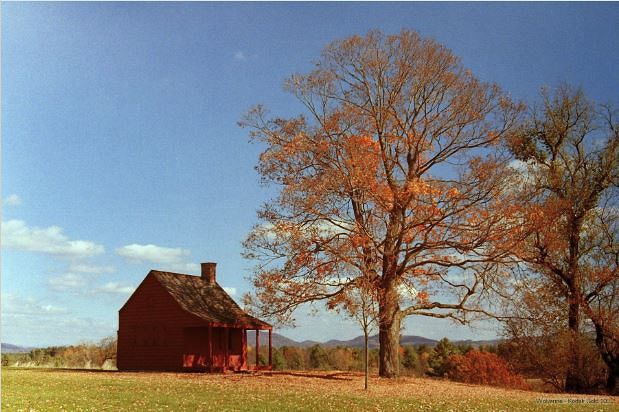
Scanned with a Wolverine F2D
Zip file that contains the above images, at eight megapixels. About 17 megs.
How much does camera scanning reduce dings and scratches?
When I created the above examples I tried to make each image look its best. I cloned out all the dings and scratches I could see. But when I looked closely at the 100% crop of the Plustek 7600i image, I noticed that there were scratches in the branches that I hadn't seen when I cloned out scratches in the sky. I was curious how dings and scratches showed up when a camera scan from my 60D was compared to a scan with my Plustek 7600i.
So I scanned the same image again. First with my 7600i and again with my 60D. And didn't clone out any scratches. I put the results on SmugMug because SmugMug lets you scroll around in high resolution images better than I can do on this site. Note when you examine these images that I scanned the 60D image after the 7600i image.
Questions? Write to camerascanning@frogymandias.org