Getting TransiDupe up and working
Installing OpenSCAD and TransiDupe
You need to be running the development snapshot of OpenSCAD version 2019.01.10 (or newer). See http://www.openscad.org/downloads.html and scroll down to the Development Snapshots section. I'm using 64 bit Windows 7, so I chose OpenSCAD-2019.01.10.ci1116-x86-64-Installer.exe I downloaded and ran it.
Run OpenSCAD from the shortcut. It should start. Go to "Help/About" It should display OpenSCAD version 2019.01.10 (or later).
Download the most recent version of TransiDupe-II.scad and put it a newly created directory somewhere. Now "File/Open" in OpenSCAD and navigate to where you stored TransiDupe-II.scad. When it opens, you must generate the preview image. Press either "F5" or click on the  icon that is just above the "Console" heading.
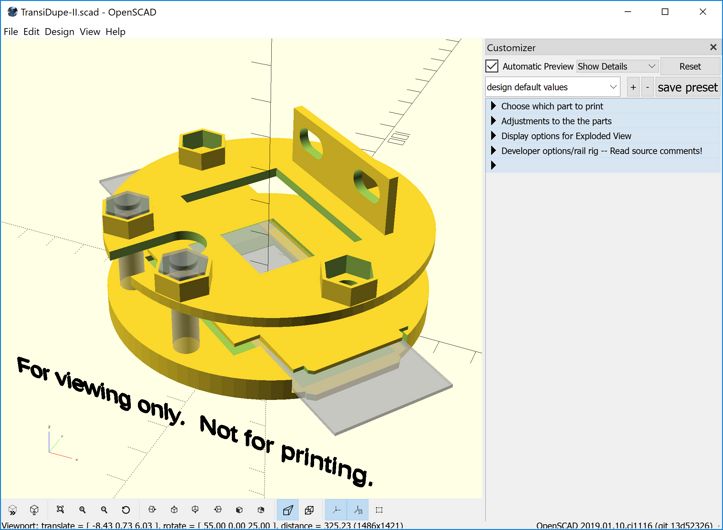
you should see something like.

OpenSCAD after you first open TransiDupe.scad
The pane at the left is the source code for TransiDupe.scad. The pane at the bottom is the console, which shows various messages. The panel that shows the edges of some yellow shapes is a very blown up version of some of the parts that comprise TransiDupe. Use the mouse wheel (or "Ctrl-[" or "Ctrl-]") to zoom in/out. Use left mouse button to change the orientation. Use right mouse button to pan around.
But we don't need to look at the source code or the console. So close them by going to the "View" menu and checking "Hide Editor" and "Hide Console". Then we want to enable the new Customizer. Go to "Edit/Preferences/Features" and check "3mf-export" and "customizer". Close the "Preferences" window and go to the "View" menu and uncheck "Hide Customizer"
Which is a lot more user friendly. Your screen should now look like
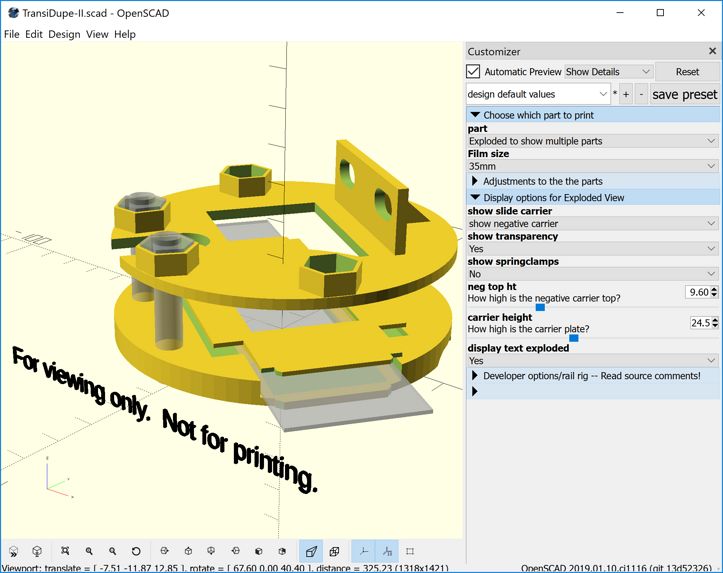
OpenSCAD Customizer panel
This is an exploded view of the parts that are needed for a negative carrier. The parts in transparent gray are standins for non-3D printed things. Like nuts and bolts. And a strip of negative film. The things that are colored yellow and green are the parts that will be printed on a 3D printer. Exploded View lets you look at them all at the same time.
Open the "Choose which part to print" and "Display options for Exploded View" tabs. The screen should now look like
OpenSCAD Customizer panel
Drag the sliders for "neg top ht" and "carrier height" all the way to the left and change "display text exploded" to "No". The screen should now look like
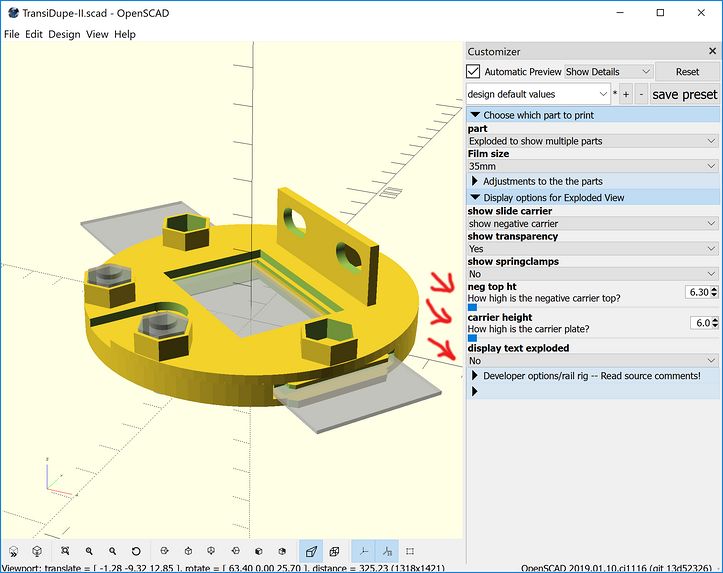
Unexploded Transidupe
Click-drag to rotate it around. Try other options in "Display options for Exploded View".
This is cool and all but doesn't get us to making a printable file. To cut down on distractions, close the "Display options for Exploded View" tab because we won't be using Exploded View for now and none of those settings will do anything.
Which brings us to selecting a single part. Under the "Choose which part to print" dialog, choose "Plate the slide and negative carriers mount to". The screen should look like
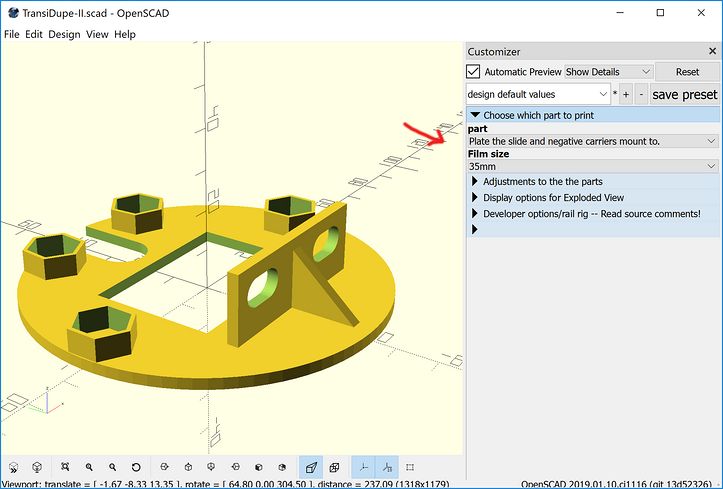
Mounting plate
Now we have a single part that is printable. Click on the  icon (F6) to render the model. This might take a few seconds. Watch the progress bar
  in the lower right. When it is done, you can export the model to a printable file by going to "File/Export" and choosing "Export as STL". It will default to a file name of "TransiDupe-II.stl", which isn't what we want. Change the file name to something more meaningful for the part like "mounting-plate.stl" (You need to do this for every export. Sorry.)
Now you have a .stl file that can be printed with your 3D printer. Load "mounting-plate.stl" into your slicing program and print. Or it can be uploaded to a 3D printing service.
You can also export to the newer .3mf file format. I haven't had any problems with .3mf but I can't vouch for all slicers and 3D printing services. .3mf is a new feature for OpenSCAD which is why you needed to enable it earlier.
Now go through the other parts. If you want to scan slides, choose "springpart slide carrier" The negative carrier has two parts, a top and bottom. The negative carrier may need additional work after it is printed.
See transidupe.html for more information on the 3D printed carrier parts.
Contact me about questions or suggestions
Questions? Write to transidupe@frogymandias.org