TransiDupe.scad OpenSCAD Transparency Duplicator
TransiDupe
Shows the parts that are 3D printed, along with instructions on how to prepare the negative carrier.
Parts exploded
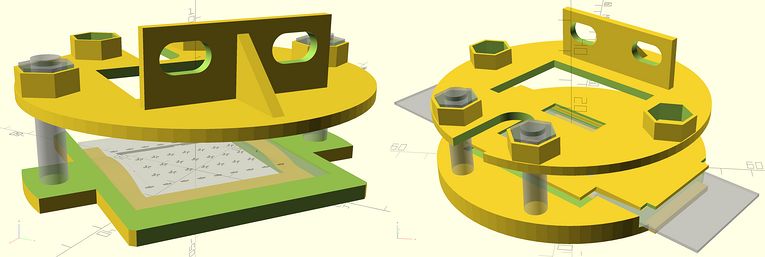
part = "exploded_rig";
Or use the Customizer to select "Exploded to show multiple parts".
The exploded variant isn't printable. But it is handy to see multiple parts rendered at once. You can experiment with different settings in the right hand Customizer panel and see the parts change in real time. For example, open the "Adjustments to the parts" tab to turn "nut traps" on or off.
Carrier plate
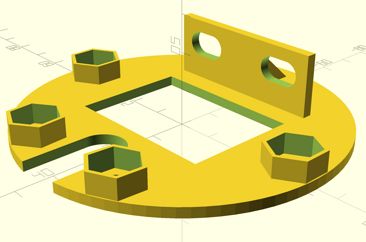
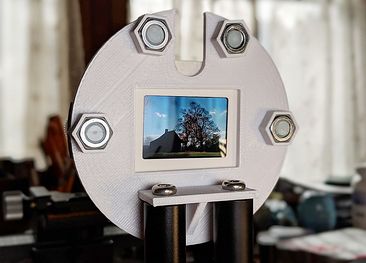
part = "carrier_plate";
use_nut_traps = "true";
Or use the Customizer to select "Plate the slide and negative carriers mount to" from the "Part" tab. etc.
Plate that the slide and negative carriers mount to. Nut traps lets you only use one hand when loosening and tightening to trim up any tilt. The holes that are used to mount to the vertical tubes (the "eyes") are enlongated so that you can make minor left-right adjustments by loosening the mounting screws.
Springpart Slide carrier
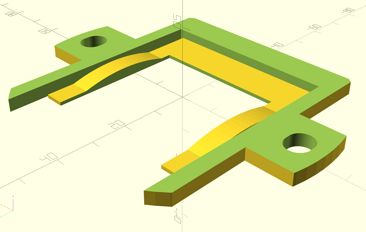
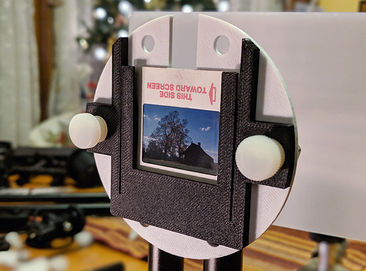
Designed to be bolted to the carrier plate with a 1/4"-20 nylon thumbscrew. The mounting holes are slightly enlongated so you can correct if the image is tilted.
Negative carrier
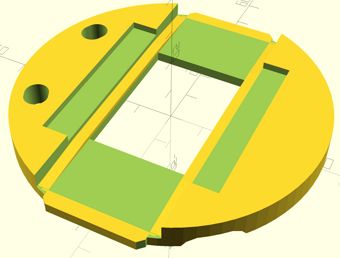
The portion of the rails where the image frame is is flat to hold this part of the negative flat. The vinyl tape (described below) provides gentle pressure to the sprocket hole areas of the negative. The reason for the sloped portions of the rails is so there will be no pressure on the parts of the negative that aren't in the image frame. This makes it easier to feed the negative through the carrier.
But we need to apply this vinyl tape.
You will need a roll of 1/8" vinyl tape. (This is often sold in the graphic arts section of a store, not in the tape section.) You will also need a roll of 3/4" electrical tape. (Try to get tape with a matte finish, not a glossy finish.) And a pair of scissors.
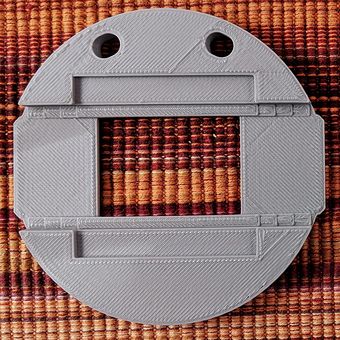
We will apply two pieces of 1/8" tape to the rails and two pieces of 3/4" vinyl tape to the area where the film image might touch.
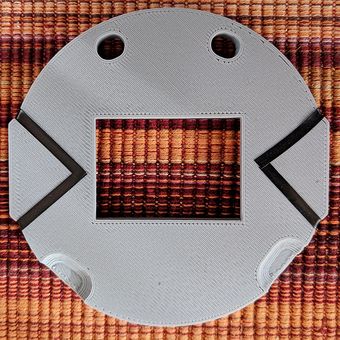
Apply the 1/8" tape, starting from the center of the side that doesn't have the rails. Apply the 1/8" tape at approximatly a 45 degree angle, as shown on the left image. Apply the tape on the rail and make the end be another 45 degree angle.
Cut the 1/8" tape with scissors and carefully stick it down (it might not stick very well to the 3D printed material.) Do the same for the other rail.
Apply 3/4" electrical tape around the channels where the middle of the film would otherwise rub against the negative carrier. Make the seam be over the ends of the 1/8" tape, on the side that doesn't have rails.
Do the same for the negative carrier top. They should end up looking like this.
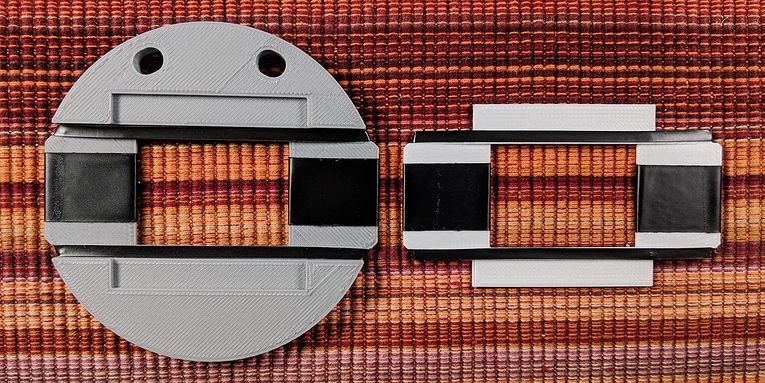
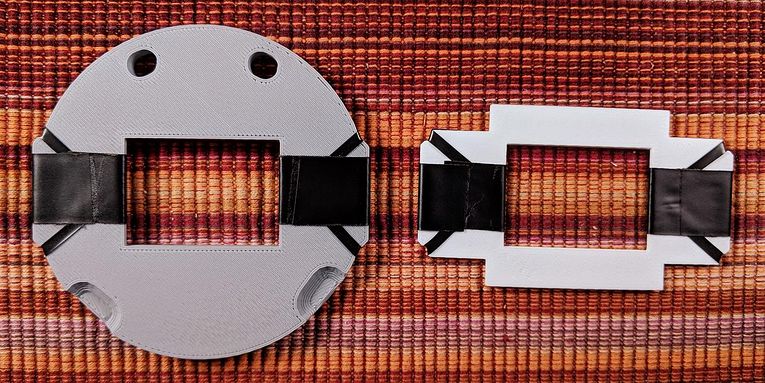
Now the negative won't catch on the steps on the rails. And the center of the negative won't rub against the rough surface that 3D printing produces.
Cafefully examine all surfaces of the carrier that will contact your negatives before you use the carrier.
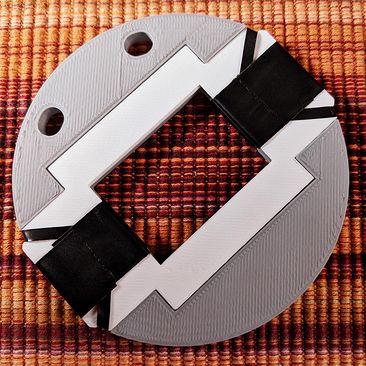
Now the negative carrier is ready to mount to the carrier plate. The part with the negative carrier top goes against the mounting plate.
Springclamps for holding the negative carrier onto the carrier plate
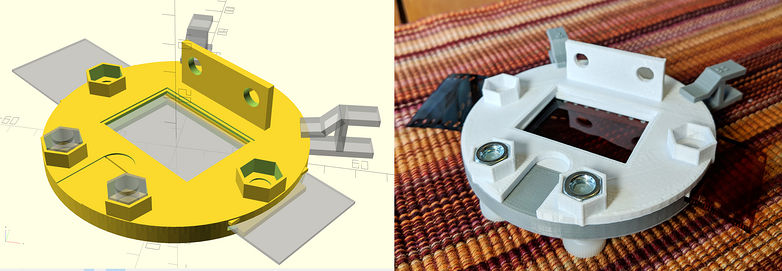
The springclamps are used to hold the bottom of the negative carrier to the carrier mounting plate. The top of the negative carrier is secured by two thumbscrews and bolts.
You make fine adjustments to the alignment of the negative (tilt, etc.) by losening the thumbscrews a bit and adjusting the carrier plate while viewing the image on your camera's live view. When the negative looks aligned, tighten the thumbscrews. Then slip the springclamps onto the bottom of the negative carrier/carrier plate. It will then be locked down solid.
Or you can use 3/4" metal clamps (instead of springclamps) to hold the bottom of the negative carrier.
Making TransiDupe
Download TransiDupe.scad and open it in OpenSCAD. Edit the part=... variable according to the part you want to make. F5 to preview. F6 to render for real (should show up as yellow and green.) Then File/Export/Export as STL... to make an .stl file. (You need to give the .stl file a meaningful file name. i. e., negative-carrier-bottom.stl for the negative-carrier-bottom. etc.)
License
TransiDupe is released under the Creative Commons - attribution license.
Contact me about questions or suggestions
Questions? Write to transidupe@frogymandias.org